
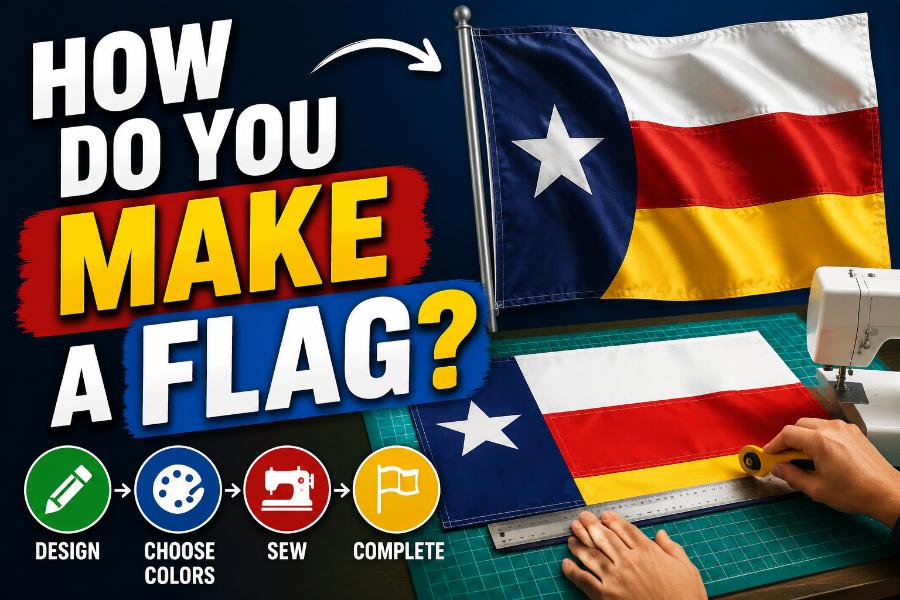
Making a flag involves two connected jobs: creating the visual design and turning that design into a durable object. You can make a simple paper flag in minutes, sew a fabric flag at home, order a digitally printed custom flag, or prepare a professional vector file for a manufacturer. The right method depends on where the flag will be used, how long it must last, and how detailed the artwork is.
This guide answers the question “how do you make a flag?” from beginning to end. It covers concept development, dimensions, fabric, printing, sewing, hems, grommets, pole sleeves, artwork files, testing, and maintenance. It also explains when a handmade approach works well and when professional production is the better choice.
Decide How the Flag Will Be Used
Start with the environment. An indoor wall flag does not face the same stress as an outdoor flag on a tall pole. Outdoor flags must handle wind, ultraviolet light, rain, dust, and repeated movement. Parade flags need a sleeve or tabs that fit a staff. Boat flags require suitable scale and hardware. Desk flags can use lightweight materials and fine detail.
Write down the viewing distance and expected lifespan. A flag seen from 100 feet needs larger shapes than one displayed behind a reception desk. A one-day event flag can use economical fabric, while a permanent institutional flag deserves stronger material, reinforced stitching, and replaceable hardware.
Choose the Flag Size and Proportion
Select a height-to-width ratio before drawing the artwork. Common custom ratios include 2:3, 3:5, and 1:2. A 3-by-5-foot flag, for example, uses a 3:5 ratio. Using a standard ratio makes replacement and scaling easier.
Physical size should match the pole and location. A flag that is too small can look lost, while an oversized flag puts excessive stress on the pole, halyard, and fabric. Manufacturers often publish size recommendations based on exposed pole height and local wind conditions. For indoor display, use the wall or stand dimensions as the primary guide.
Add seam allowance to your cutting plan. If the finished flag should be 36 by 60 inches, the fabric pieces must be slightly larger so the hems and joins do not reduce the final size. The exact allowance depends on the seam type and equipment.
Create a Simple, Reproducible Design
A flag should rely on bold shapes, strong contrast, and a limited number of colors. Tiny lettering and detailed photographs are hard to see when fabric moves. Build the main structure first: field, stripes, diagonal bands, cross, circle, or one dominant symbol. Add smaller details only after the design works from a distance.
If you are making the flag by sewing separate pieces, simpler geometry saves time and produces cleaner results. Straight bands are easier than curves. Large appliqué shapes are easier than clusters of small symbols. If the design contains gradients, photographs, detailed coats of arms, or many colors, digital printing is usually the practical production method.
Use Flag Makker to test the concept online. Compare color order, proportions, symbol size, and placement before purchasing fabric. Export or recreate the chosen design as a clean vector file for accurate scaling.
Prepare the Artwork File
For professional printing, vector artwork is preferred. SVG, EPS, AI, or print-ready PDF files preserve sharp edges at any size. Convert text to outlines if lettering is unavoidable, and make sure all shapes are closed. Remove hidden layers and effects that the printer may not support.
Specify colors clearly. HEX and RGB values are suitable for screens, while CMYK or standardized spot references help with print communication. Fabric, ink, lighting, and finishing can change the final appearance, so request a physical proof or swatch when color accuracy is important.
Set the document to the exact flag ratio and include bleed only if the printer requests it. Keep important symbols away from the outer fly edge and from seams. For double-sided flags, ask whether the design will be mirrored through one layer, printed on two layers, or constructed with a blockout liner.
Choose the Right Fabric
Polyester is a common choice for outdoor flags because it offers strength, good color performance, and several weight options. Knitted polyester is lightweight and flies in relatively low wind. Heavier woven polyester can be more durable in strong conditions but may require more wind to display fully.
Nylon is lightweight, bright, and responsive to gentle breezes. It is often used for high-quality outdoor flags, although product performance varies by weave, coating, and climate. Cotton has a traditional appearance and rich texture, making it attractive for indoor, ceremonial, or historical display, but it is generally less weather-resistant than synthetic flag fabrics.
For handmade decorative flags, canvas, felt, quilting cotton, or recycled fabric can work. Consider fraying, stretch, transparency, weight, and washability. Test a small piece before committing to a large project.
Method 1: Make a Simple Sewn Flag
A sewn flag is ideal for designs made from large blocks of solid color. Create a full-size paper plan or calculate the dimensions of each panel. Wash and press natural fabrics if shrinkage is possible. Cut the pieces with a rotary cutter, straightedge, or sharp fabric scissors.
Join color panels using a flat-felled seam, French seam, or another enclosed seam suitable for the fabric and load. Keep the seam straight and avoid stretching lightweight material. Press the seam carefully if the fabric allows heat. For a cross or central symbol, appliqué can be stitched onto the field using a narrow zigzag, satin stitch, or turned-edge technique.
Check the reverse side as you work. A professional flag should look organized from both directions. Trim loose threads and prevent bulky stacks of fabric at intersections.
Method 2: Make an Appliqué Flag
Appliqué allows you to add stars, emblems, letters, or curved shapes to a base field. Print or draw the symbol at full size, transfer it to fabric, and add a stabilizer if the material shifts easily. Cut carefully and position the element using temporary adhesive, pins, or basting stitches.
Sew around the edge with a close zigzag or satin stitch. For a double-sided appearance, place matching shapes on both sides and align them as precisely as possible. Complex emblems may require many layers and can become heavy, so simplify the artwork before cutting.
Laser cutting can seal some synthetic fabrics and produce precise pieces, but it requires suitable equipment and ventilation. Always verify that the material is safe to cut with the chosen tool.
Method 3: Print a Custom Flag
Digital dye-sublimation printing is widely used for polyester flags. The design is transferred with heat so the color bonds with the fibers. A single-sided print often shows through to the reverse, where the image appears mirrored and may be slightly lighter. This is normal for many outdoor flags.
A true double-sided flag generally uses two printed layers with a light-blocking liner between them. The artwork reads correctly from both sides, but the flag is heavier and may need more wind. Screen printing can be cost-effective for large quantities with a limited number of solid colors. Direct printing and other methods may be used depending on fabric and supplier.
Provide the printer with the vector file, finished dimensions, orientation, finishing requirements, color references, quantity, and intended use. Ask for a proof that shows both artwork placement and construction details.
Finish the Edges
The fly edge experiences the most movement and often wears first. Fold and sew a double hem using multiple rows of stitching for outdoor use. Reinforce corners, where stress concentrates. The top and bottom edges should also be hemmed or integrated into panel seams.
Use UV-resistant polyester thread for outdoor flags when possible. Cotton thread can deteriorate faster in wet and sunny conditions. Stitch length should be appropriate for the fabric: extremely short stitches can perforate lightweight material, while very long stitches may not hold under repeated stress.
Add a Header, Grommets, or Pole Sleeve
A flag for a halyard system commonly has a strong header along the hoist edge, often made from canvas or reinforced webbing. Metal or plastic grommets are installed near the top and bottom so clips can attach the flag to the line. Grommets must be correctly sized and set through reinforcement, not thin fabric alone.
A pole sleeve is a fabric tunnel that slides over a pole or parade staff. Measure the pole diameter and add enough ease for movement. Some sleeves include a leather or fabric tab inside the top to prevent the flag from sliding down. Decorative indoor flags may use loops, ties, or a horizontal rod pocket.
Choose the finishing method before finalizing the artwork because a sleeve or header occupies part of the visible width. Do not place critical symbols under hardware or inside the wrap around a pole.
Make a No-Sew Flag
For a temporary craft, cut felt or non-fraying fabric to size and attach shapes with fabric adhesive. Iron-on bonding web can join layers when the materials tolerate heat. A wooden dowel can be inserted into a folded and glued sleeve. This method works for classrooms, parties, props, and short indoor events.
No-sew construction is not usually durable enough for a permanently flown outdoor flag. Adhesives may soften in heat, become brittle, or release after moisture exposure. Treat the project as decorative unless the products are specifically rated for outdoor textile use.
Make a Paper Flag
A paper flag is the easiest educational version. Draw or print the design on both sides of a sheet, leaving a narrow blank margin at the hoist. Fold that margin around a paper straw or small dowel and secure it with glue or tape. Use light card rather than heavy board so the flag can move.
For a garland, print several small flags, fold each one over string, and glue the halves together. Maintain the correct orientation on both sides, especially when the design includes a canton or directional emblem.
Quality-Control Tests
Lay the finished flag flat and measure all sides and diagonals. Equal diagonals help confirm that the rectangle is square. Inspect seams, hems, corners, and hardware. Pull gently at stress points and check that appliqué edges are secure.
Hang the flag indoors before outdoor use. Verify that the top is correct, the hoist finish fits the hardware, and the design reads properly from the intended viewing direction. For a printed flag, compare the proof, front, reverse, and color consistency.
Test movement in a safe open area. The flag should lift without wrapping excessively around the pole. Heavier double-sided construction may require a different location or pole system.
Care and Maintenance
Take outdoor flags down during severe storms or extreme winds unless the flag and pole are specifically rated for those conditions. Allow wet flags to dry fully before storage. Dirt and airborne particles can abrade fibers, so follow the manufacturer’s washing instructions and avoid harsh chemicals.
Inspect the fly edge regularly. Early repair of a small fray can extend the flag’s life. Trim loose threads and resew the hem before damage reaches the main field. Store the flag clean, dry, and loosely folded or rolled to reduce permanent creases.
Frequently Asked Questions
Can I make a flag with a regular home sewing machine? Yes, especially for lightweight or medium fabrics. Use a suitable needle, strong thread, and test the stitch on scraps. Very large or heavy flags may be easier with an industrial machine.
What fabric is best for an outdoor flag? Knitted or woven polyester and nylon are common choices. The best option depends on wind, climate, desired lifespan, and whether the flag must fly in light breezes.
Should a flag be single-sided or double-sided? Single-sided flags are lighter and often show a mirrored image on the back. Double-sided flags read correctly from both directions but are heavier and cost more.
What file format should I send to a flag printer? A clean vector file such as SVG, EPS, AI, or print-ready PDF is usually best. Confirm the supplier’s specifications before exporting.
How do I stop a handmade flag from fraying? Use enclosed seams and double-fold hems, seal compatible synthetic edges carefully, and reinforce the fly corners. Regular inspection and early repair are also important.
Conclusion
To make a flag successfully, plan the use, ratio, artwork, material, and finishing method as one system. Simple solid-color designs are excellent for sewing and appliqué. Detailed artwork is usually better suited to professional printing. Strong hems, reinforced corners, and correct hoist hardware are just as important as the visual design.
Begin the creative stage with Flag Makker, where you can compare layouts and colors before cutting fabric or placing an order. Once the design is clear, choose the production method that matches your skill, budget, and environment. Careful preparation turns a digital idea into a flag that looks good, flies well, and lasts.